A Case Study: All-Terrain Overland
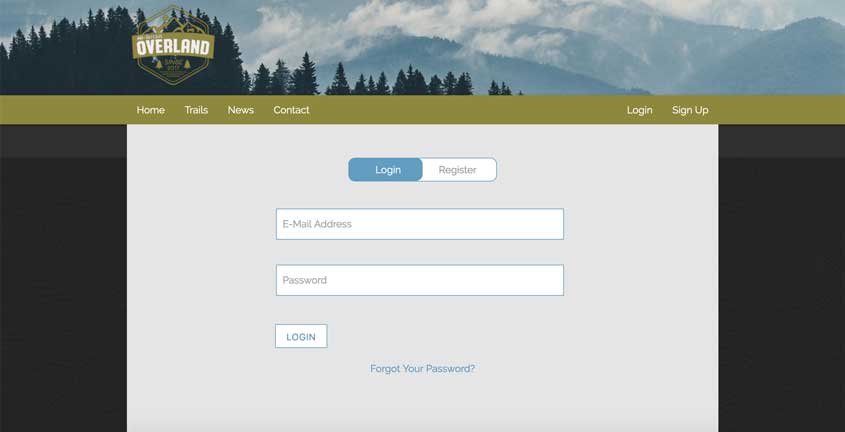
 Login Page
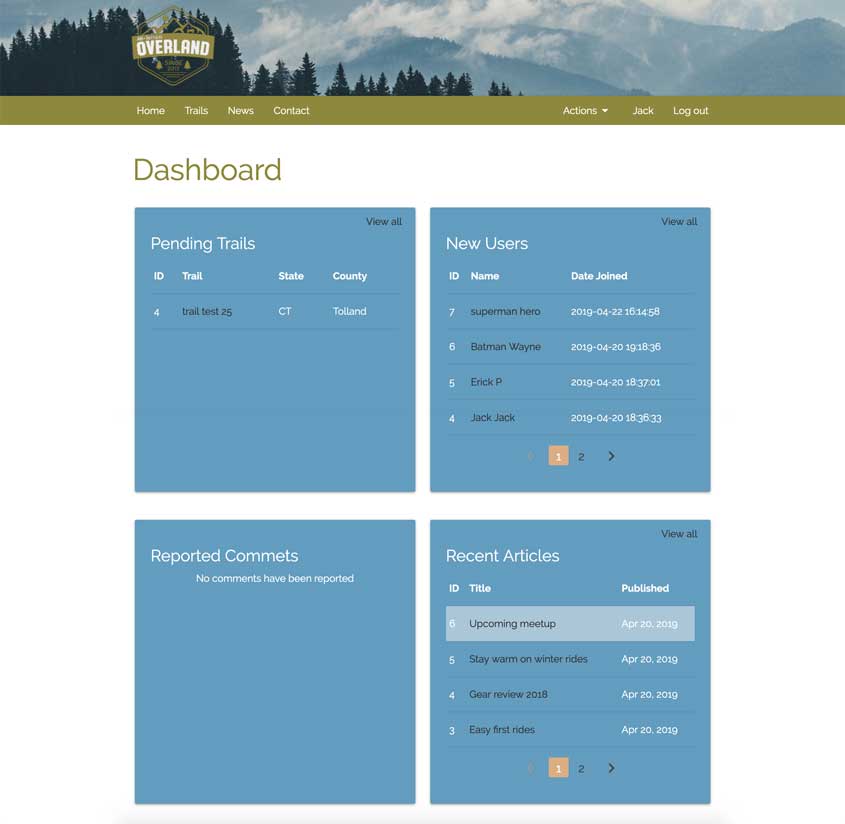
 Dashboard (Admin and Moderators)
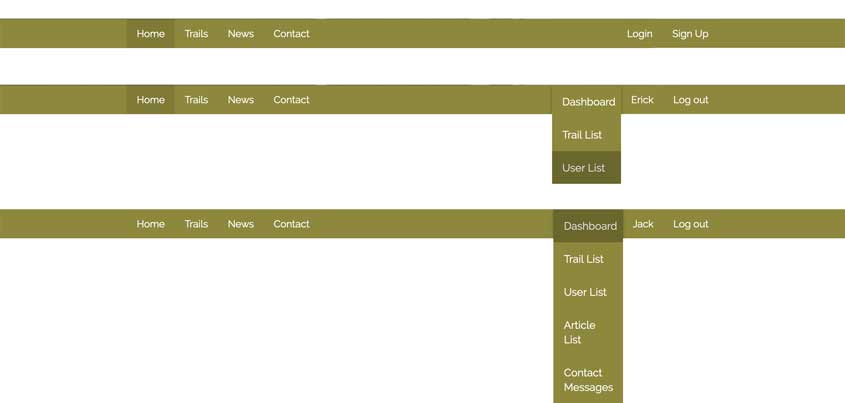
 Navigation
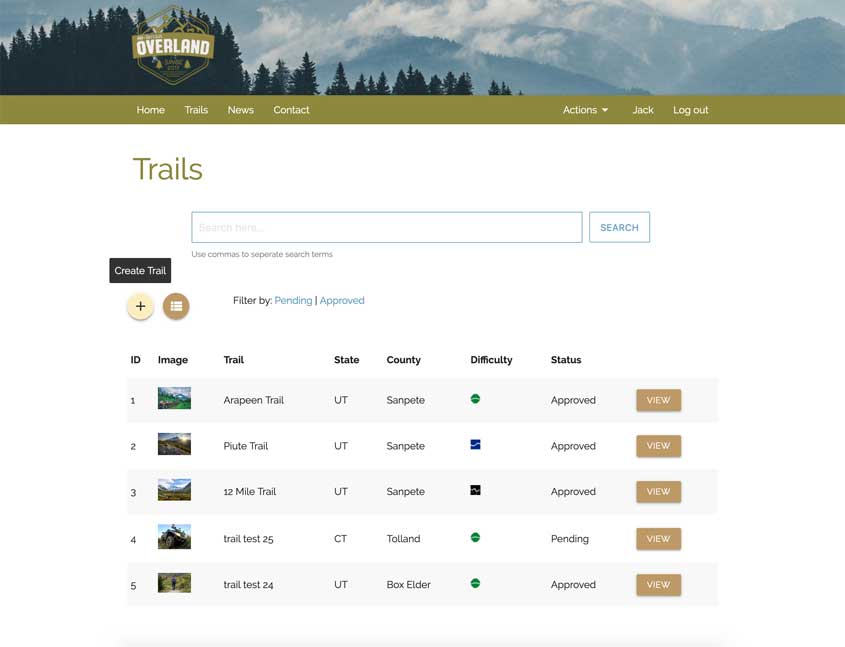
 Trail List (Admin / Moderators)
 Edit Trail (Admin / Moderators)
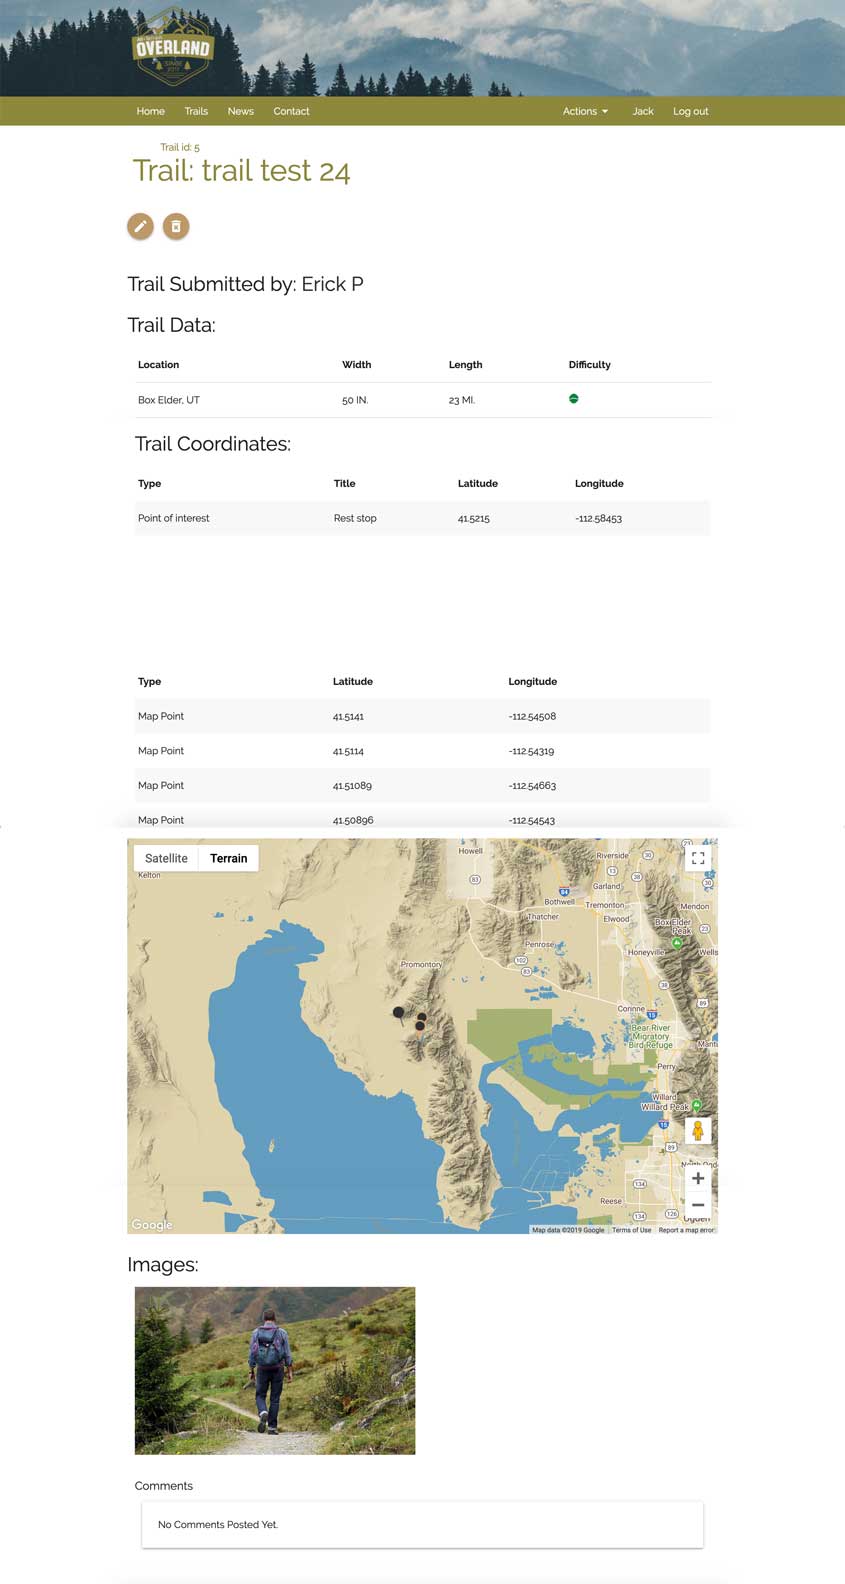 Trail Information (All Users)
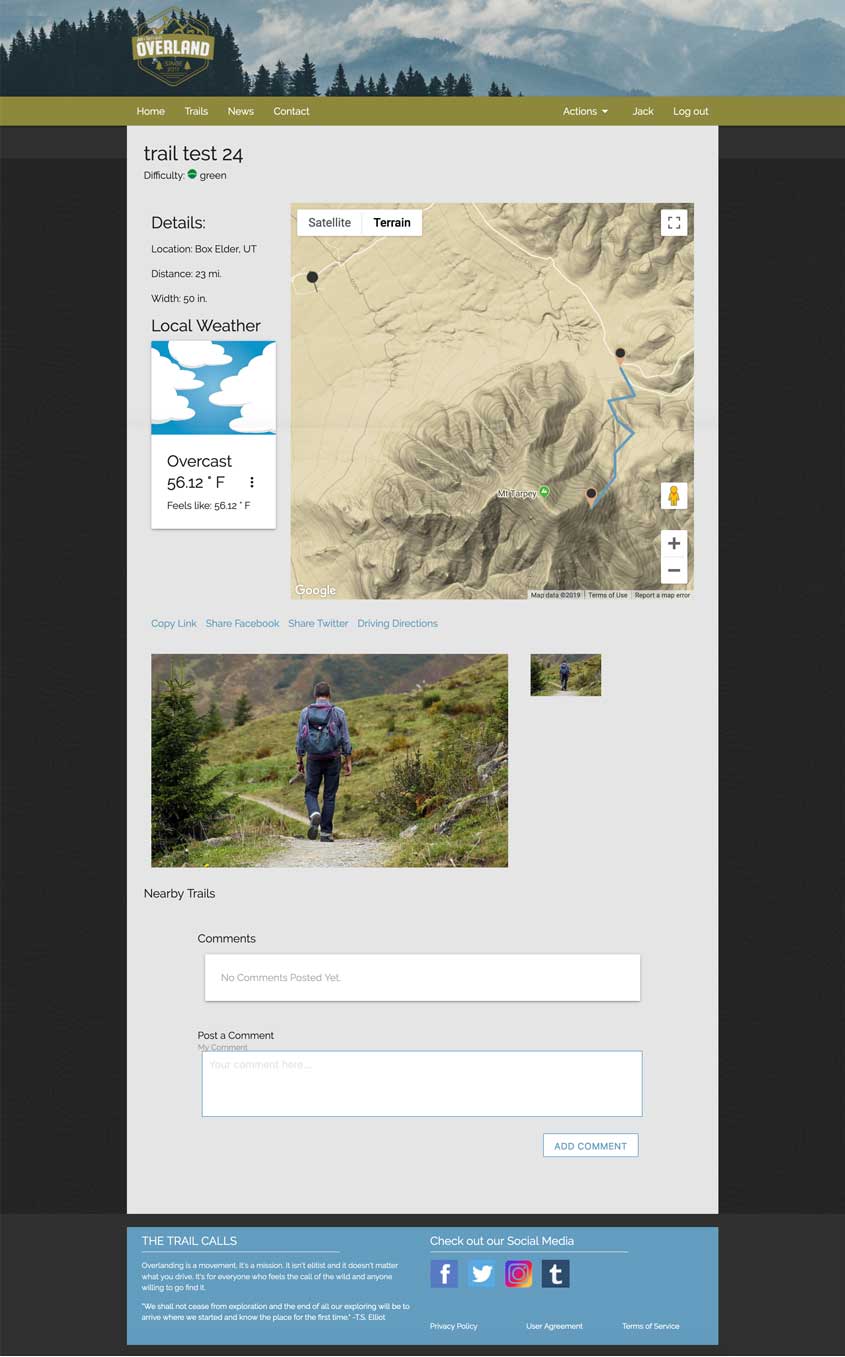 Trail Weather
 Trail Comments (Logged In Users)
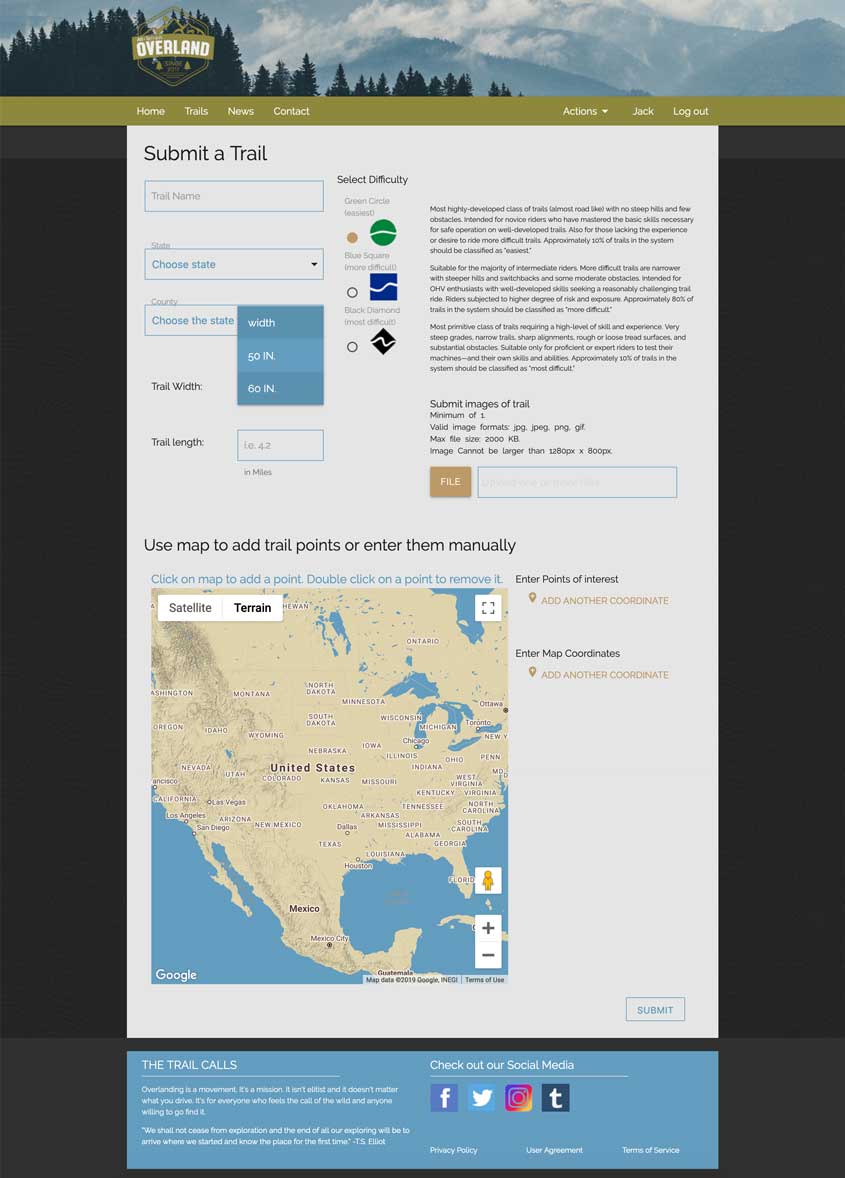
 Create Trail (Logged In Users)
- Client: All-Terrain Overland
- Duration: 6 months
- Role: Full Stack Web Developer
-
-
Team Members:
- Austin (Project Manager / Web Developer)
- Branton (Web Designer / Web Developer)
The ProblemClient Needs
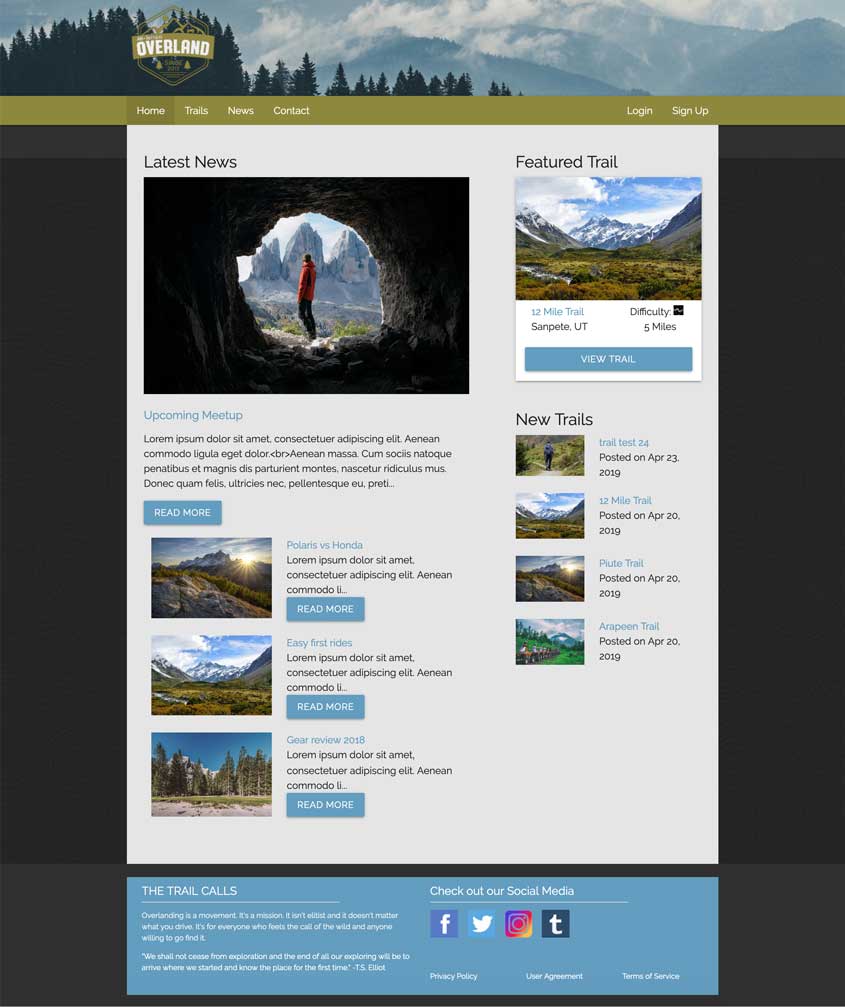
All-Terrain Overland needs a place to provide information on off-road trails including trail length, difficulty, local conveniences (grocery stores, gas stations, etc.), weather conditions, areas nearby that are open to camping, fishing and hunting.
Client Requirements:
- News Feed
- Submit/view trail info
- System administration and moderation of submitted content
SolutionWeb Based Application
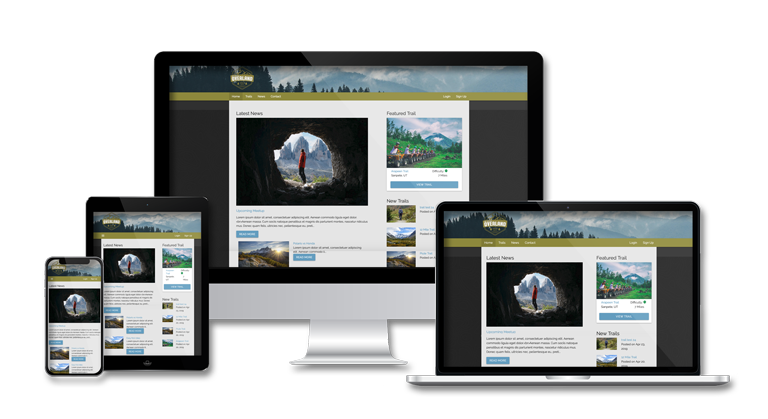
The solution is to build a responsive web based application that will include the client goals to provide a news feed, trail information and the ability to administer the system. The administration system will include the ability to add news articles, trails with their associated sub-data, adding users and assigning permissions/roles and include the ability to update/remove each of those pieces. This will be a multi-page dynamic site built upon the Laravel PHP framework with a MySQL database and deployed and hosted using Vultr.
Deliverables:
- Project proposal
- Design document
- UX/UI Prototype
- Responsive Web Application
Process Overview:
- Find Audience
- Pages Table
- Flow Chart
- Sitemap
- Wireframe
- Branding Guide
- Surface
- Development
- Testing
The Process The Audience
We followed a 2-week sprint methodology. Every 2 weeks we held a meeting with all the team members present where we discussed the tasks and assignments for the next 2 weeks. The first step was to find the audience for All Terrain Overland. We conducted research of other website / companies with similar functionalities. We looked at their audiences, made surveys for possible users, and made personas to get a more detail view of various types of users. Our research was summarized by 3 personas who were mainly differentiated by their experience. From a beginner overlander to a well experienced overlander.
The Process Flowcharts and Sitemaps
We thought about the total number of pages and the type of content each page would have. We planned every page. Each page was only included if it was important and if it would add value to the website. This plan led us to the next logical step, creating flow charts and sitemaps. The sitemap shows the structure of the website. The sitemap lets us see the relationship of each page. Flow charts on the other hand deal more with the behavior of a user using a website. We made flow charts for every user. The flow charts displayed the main objective of a user. For example, the main objective of a regular user is to create a trail. The flow chart shows what steps the user would take to create a trail.
The Process Wireframes
Once we had a sitemap and knew what pages needed to be created, we started making wireframes. The wireframes main goal is to show how the website would look like. Our wireframes were low fidelity. They did not have any colors, graphics, or branding. We spent a great majority of our time in this phase because we could see if each part of the pages would work with our personas and flow charts.
The Process Surface Compositions and Branding
After the completion of the wireframes, we started to focus on a simple branding guide for the website. With the wireframes and style guide in hand, we created surface compositions. Surface comps are like wireframes but are usually high fidelity and are closer to the final product. Wireframes helps us to see how the website will look but surface comps give us a feel for the website.
The ProcessLaravel / MySQL
The backend was created using the Laravel PHP framework and a MySQL database. Laravel is a fantastic framework. The main reason I like Laravel is because it comes with many tedious features out of the box such as authentication, routing, MySQL integration, Page templating engine, email system, development environment, pre-made CRUD classes, Roles and Permissions and much more. The framework helped us focus on the logic for the website without worrying about the other stuff like authentication. Laravel was the ideal solution for us, we saved 2 to 3 months’ worth of work.
The ProcessAdmin
Since we used Laravel, it allowed us to make a custom content management system. The website has 2 views, the user and administrative. The administrative view could be seen by users who were registered as administrators or moderators. The administrative view had the same pages as the user with the addition of a dashboard and pages for managing users, trails, comments, and news. We used Laravel’s built in roles and permissions system. This system was managed using the Spatie Permissions package for Laravel. We had 4 types of users: guest, logged in user, moderators, and administrators. All the roles had different permissions like the administrator was the only role that could manage the news section of the website. Users could only submit and comment on trails. Guests can only view trails and read news articles.
The ProcessAuth and Nav
Since we had various roles, each role had different views and options to use on the site. The most obvious example is the navigation bar. When a user is logged in the navbar will display their name. If the user is a moderator or administrator, they will have options to manage various parts of the website.
The ProcessCreating Trails (Maps API)
Throughout the project, I encounter many challenges. The most difficult challenge was working with the Google maps API. This was the first time using this API and it involved a lot of custom code because the API could not fulfill our requirements. I had to read a lot of the Google maps API documentation to understand how it worked. I also got help from the project manager which led me to the right direction. With all the help and research, I could complete this part of the project. Even though it’s not perfect, it functions the way we wanted it. I am satisfied with the results of the challenge. Users can now click on the map and the script figures out the trail route and saves it to the database for other users to view it.
ConclusionA Learning Experience
This project took 6 months to complete, we meet the client requirements. The client was satisfied with the results. I learned new technologies that I can use in future projects and I gained more experience working with others.